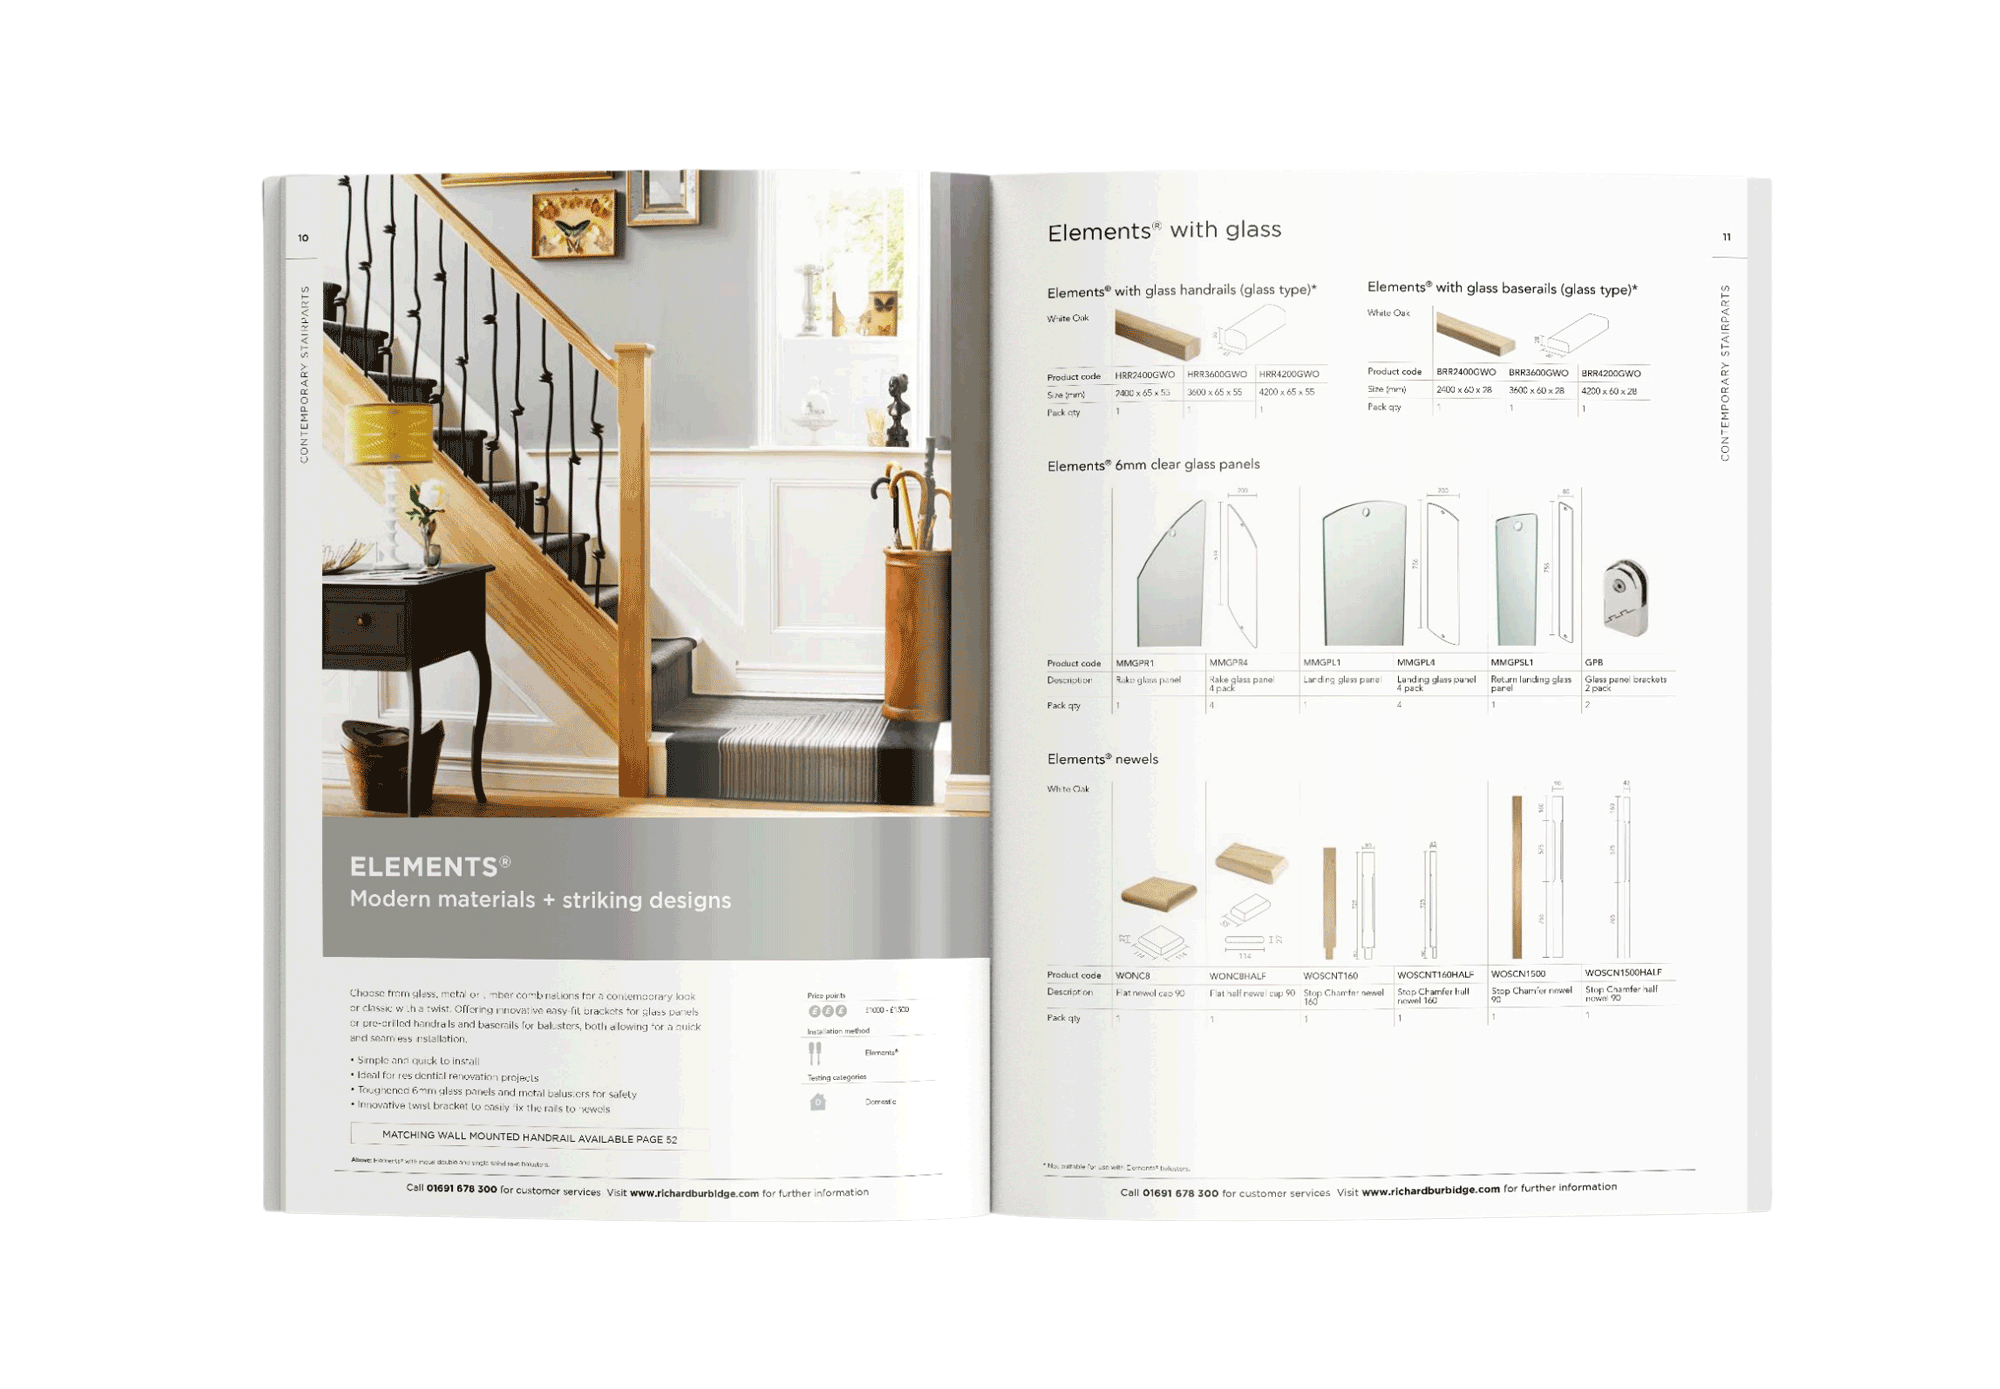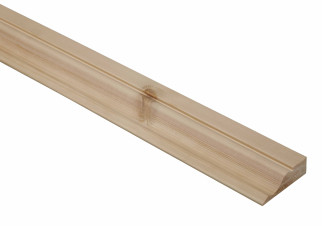

10 Pine Ogee Architrave Mouldings 18 x 58 x 2100mm
Architrave adds a decorative surround to your door way.
- Manufactured from high quality pine.
- Easy and effortless to fit using adhesive, pins, or screws.
- The planed finish makes it easy to paint, oil, wax, stain or varnish to complement your interior design.
- High quality, hardwearing and durable.

Doors
Use our architrave mouldings for a decorative surround or to frame any doorway. Ideal for hiding faults, smoothing rough edges or masking fixings on door frames. Available in a variety of finishes to match any project or design.
View All ProductsSpecification
Product detail and dimensions
| Code | DRS6003 |
| Pack Weight | 10.96 Kg |
| Height | 58mm |
| Length | 2100mm |
| Depth | 18mm |
| Product Type | Ogee Architrave |
| Unit of Measure | Pack |
| Pack Quantity | 10 |
| Material | Pine |
Request A Design Service
Need help with your project?
Get in touch with us today
Careful planning is the key to a successful project. Our team of helpful experts are here to assist you.
Request A Design ServiceHow To Guides
Our easy to follow step-by-step guides have been developed to help you achieve stunning results every time.
How To Fit Wall Panelling
A step-by-step guide to creating a feature wall within your home, using Richard Burbidge mouldings and basic woodworking tools and techniques. There are hundreds of different designs you can create with wall panelling, in this guide we are going to be showing you how to install the classic but contemporary square panel design that goes from floor to ceiling, to create a feature wall. 1. Planning and measuring Planning is the most time consuming, but also the most important step of the whole process. Firstly, you will need to measure the walls every length and width, making a note of any fittings and fixtures you will need to avoid. Draw your design with the measurements on some paper, making sure to plan an equal gap horizontally and vertically. The next step is to transfer your measurements and plan to the wall, using a pencil, tape measure and laser level, mark where each panel piece will be, while bearing in mind the width of the panel. We also recommend removing skirting and architrave on the feature wall to achieve a professional finish. 2. Choose your Richard Burbidge moulding Richard Burbidge mouldings are of the highest quality and can totally transform the look and character of a whole room. Our stripwood range has a vast selection of panel sizes to choose from. For this project we are using STW6027 which is a 12 x 96 x 2400mm pine panel that creates the classic square feature wall you will have seen everywhere on Pinterest and Instagram! 3. Cut the panels to length The next step is to cut your panels to length. Our stripwood mouldings are 2400mm in length which is the average height of most rooms, so you won’t need to cut the mouldings that are being placed vertically. Using a saw and mitre box at a 90 degree angle, carefully cut the panels that will be horizontally placed according to the measurements you noted from step 1. Repeat this process to all of the horizontal panels, then lightly sand the ends until smooth. If your wall is not 2400mm in length then you will need to cut the moulding according to your walls measurements using this same method. 4. Apply panels to the wall When applying the panels to the wall start with the vertical panels, then the horizontal panels. To apply the panels to the wall we recommend nails and adhesive for that extra security and hold. Place your panel onto the wall where you marked out in step 1, use a laser level to ensure the panel is straight, then apply strong hold adhesive to the back and apply to the wall, next use a nail gun to fully secure the panel to the wall. Repeat this process for all panels. Ensure you use a pipe and cable detector before nailing or drilling into any walls. If you are unsure if it is safe to nail into your wall, opt for a strong adhesive instead. Once you have applied the panels, use decorators caulk to patch any gaps, cracks, or holes, then sand prior to finishing. 5. Add your own creative flare This project can be customised to work with any décor and colour scheme. There are many different ways you can add your own creative flare to this project. You can choose to paint the whole wall one colour, or you can use a few different paint colours, paint dots, stripes or squares, or even draw your own unique design to really make this wall the focal point of your home. There’s an endless list of ways that you could choose to add your own creative flair. We used COAT Paint's Sunday Soul. 6. Share your DIY renovation project We love seeing how you have transformed your home with Richard Burbidge. Upload a picture of your DIY project to Instagram or Facebook and tag us @richard_burbidge. You can also upload your images to our testimonials page here. We can’t wait to see what you create with Richard Burbidge mouldings!
READ HOW TO GUIDE
How To Make a Clothes Stand
A step-by-step guide to creating a DIY clothing stand, using Richard Burbidge mouldings and basic woodworking tools and techniques. This project is so versatile and can be used in any room, from a towel stand in the bathroom, a coat rack in the hallway, to a clothing stand in the bedroom. This project can be completed within an hour, and is perfect as a first DIY project. 1. Choose your Richard Burbidge moulding Firstly you’ll need to decide the style you’re going for – we recommend our dowel mouldings for this project. Richard Burbidge mouldings are of the highest quality and can totally transform the look and character of a whole room. If you are going for a contemporary style we recommend painting, our pine dowel works best with paint. To achieve a natural Scandinavian look, use our light hardwood dowel and opt for staining to achieve a professional finish. View our full range of dowels here. 2. Cut the dowels to length Next, we must decide on the height of the clothing stand, we recommend cutting the dowels to 1500mm which is just under 6 foot, this would be the ideal height for most homes. If the clothing stand is for a children’s room you may want to cut the dowel slightly smaller, 1100mm would be ideal for most children. You can make your own adjustments to the height if necessary. Using a tape measure, mark your chosen measurement onto the dowels. Using a panel saw carefully cut the dowel at a 90 degree angle along the line you have drawn. Repeat this process to the four dowels, then lightly sand the ends until smooth. 3. Add your own creative flare This project can be customised to work with any décor, in any room. There are many different ways you can add your own creative flare to this project. You can paint each dowel a different colour, paint dots or stripes onto the dowels, or even draw your own unique design to really make the clothing stand your own. There’s an endless list of ways that you could choose to add your own creative flair, but remember to sand first and always follow the paint manufacturer’s instructions which may require you to prime before painting. 4. Tie the dowels together Next, you will need to tie the dowels together. Like painting, there are dozens of different materials you can choose to use, with rope being the most sturdy and secure. You can use any material as long as it is strong enough to hold the dowels together, this could be some leather or ribbon that matches your décor. Once you have decided on the material, gather the dowels together, tightly wrap the rope around the dowels approximately 45cm from the top, and tie them in a secure double knot. Stand the dowels up and evenly separate. 5. Place your stand in its new home The last step is to decide where you are going to place your new clothing stand. This project is so versatile and would work well in any room, from a towel stand in the bathroom, a coat rack in the hallway, to a clothing stand in the bedroom, this project is perfect for all homes. The best part about this project is that the stand can also be folded down and stored away ready to bring out to impress your guests and hold their coats.
READ HOW TO GUIDE
How to Make and Fit a Pine Board Shelf
A step-by-step guide to making and fitting a pine board shelf, using Richard Burbidge pine board and basic woodworking tools and techniques. Step 1. Choose your pine board and brackets Firstly you’ll need to decide the style you’re going for – we recommend our pine board for this project. Our flat sheet pine panels are available in a variety of different sizes and thicknesses, with a board to suit every requirement. View our selection of pine board here. You will also need to select your brackets, which can be found at any hardware store. Opt for metal brackets for an on-trend industrial style, or select timber brackets for a natural and rustic look. For the more advanced DIY enthusiasts, you may opt to create your own timber brackets. You can do this using pine board and a coping saw. Also consider the weight of the items you will be placing on the shelf, you will need to select heavy duty brackets for weighted items. Step 2. Cut to size and add your creative flair to your shelf Depending on the size of pine board you have selected, you may wish to cut your pine board to your desired length. You can do this using a mitre box and saw. Next, if you wish to decorate your shelving, you can either paint, wax or stain depending on your desired look. For a smooth finish you can sand down your pine board. You can also add a decorative cover around your shelf, you can do this using decorative mouldings. We used DEC6014 for a more put together finish. View our range of decorative mouldings here. These steps are entirely optional and all depend on the final look you are striving for. This project can be customised to work with any décor, in any room. There’s an endless list of ways that you could choose to add your own creative flair. Step 3. Decide where to place your shelves Next, consider where you will be placing your shelves. Ensure you use a pipe and cable detector before nailing or drilling into any walls. You must also consider the type of wall you have. When fixing to a masonry wall you will need a masonry drill and wall plugs. If fixing to a stud wall, use a stud detector to locate the vertical timber studs, you will not require wall plugs with a stud wall. Ensure that you wear safety glasses and gloves when drilling. Step 4. Fit brackets to wall We recommend fitting the brackets to the wall first. Use a spirit level to make sure your bracket is straight, mark the holes onto the wall with a pencil, and then drill into the wall. Fit wall plugs into the drilled holes if you have masonry walls. Then, fit the bracket into the drilled holes by using screws and a screw driver. Repeat this process for the other bracket, again using a spirit level to ensure the brackets are perfectly aligned. Step 5. Fit board to brackets Next, hold up your pine board onto your brackets to determine where the bracket holes will be on your pine board. Take a pencil and mark these holes. Remove the pine board, and drill pilot holes into the shelf, ensuring you don’t drill through the board. Lastly, attach the board with screws and your shelf should be up and ready! Step 6. Share your DIY renovation project We love seeing how you have transformed your home with Richard Burbidge. Upload a picture of your DIY project to Instagram or Facebook and tag us @richard_burbidge. You can also upload your images to our testimonials page here. We can’t wait to see what you create with Richard Burbidge mouldings!
READ HOW TO GUIDECustomers also viewed


Experience